
Are looking to set up your professional Hostinger webmail?
Your man is here! I’ll help you create Hostinger webmail with simple clicks.
If you’re starting a blog, the next step is to set up a professional email for your business. With Hostigner, you can do it easily.
Read: Hostinger Top Features, Drawbacks, and more
What is Hostinger webmail?
Hostinger webmail is an email service provided by the web hosting provider Hostinger. It enables the audience to set up and manage email accounts linked to their domain names.
Let’s get into the topic.
1. Email Setup
Step 1:- Log in to the Hpanel of Hostinger
To create a webmail in Hostinger, you need an account. Once you login to your Hostinger account, this is what your dashboard looks like:
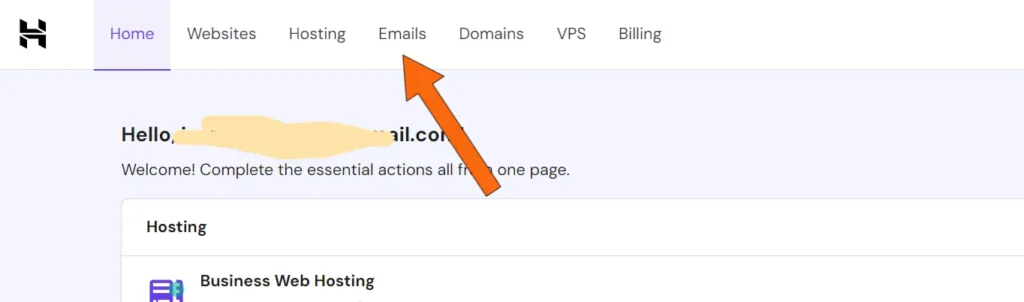
Step 2:- Email section
After logging into Hpanel, click the” Emails” option on the top menu, as I showed in the below screenshot.
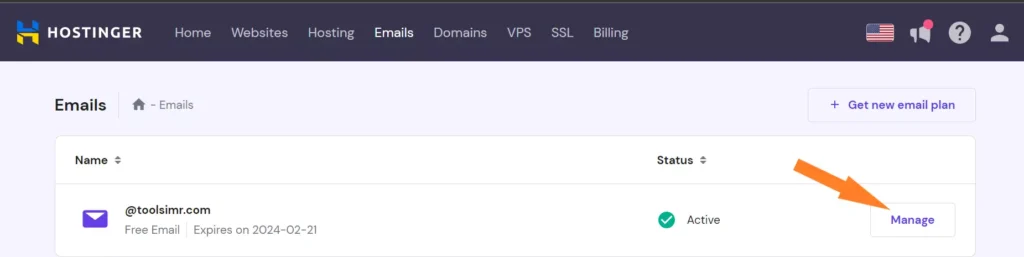
Step 3:- Email Manage
After clicking on “emails,” you are redirected to this page, as shown below, and then click on the “Manage” button, as shown below.
Step 4:- Select the Email plan
Press the “select” option on the free plan as I have shown below
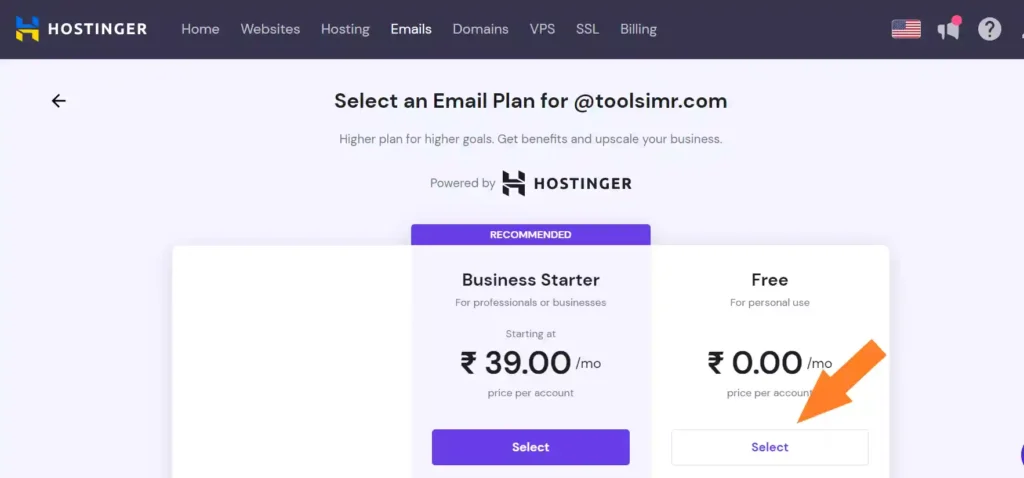
Select an email plan for you there are two types of plans available in Hostinger company one is a business plan and the second is a free plan. Hostinger provides various email hosting plans with different features and storage options based on your needs.
| Features | Business plan | Free plan |
| Email storage per account | 10 GB | 1GB |
| Forwarding rules | 10 | 1 |
| Email account aliases | 50 | 5 |
| Custom DKIM (Doamin key identified mail) | ✔️ | ❌ |
| Advanced anti-spam and anti-virus | ✔️ | ❌ |
| Rich webmail | ✔️ | ✔️ |
Step 5:- Set up the Email service
After selecting a free plan you will be directed to a new window that shows your- Email account details as shown below.
You can create a new Email account by entering a new email name and password. After clicking on Create you may see configure apps and devices below the page.

An email account is ready to use and you can click the Complete button to finish the setup process.

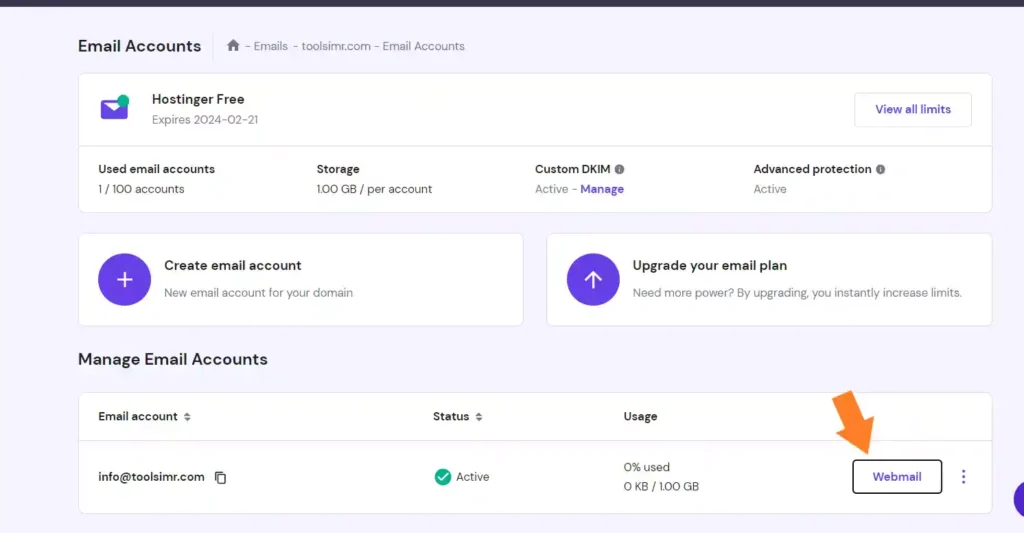
After completing your Email setup you’ll be directed to this page as I showed below where you can access your webmail by clicking on the arrow (symbol) as indicated in the screenshot below.
Read: How to Create Subdomain in Hostinger
2. Configure the Email address
Before you start using your professional Email address in Hostinger, there are some configurations. One such thing by adding a signature to your email, this can help increase professionalism and authority.
Now I will show you how to add a signature using Hostinger webmail
step 1:- login into Webmail
All you need to do login into the webmail interface, click on the settings icon on the left side menu

After that, you see an interface like this,
Step 2:- Signature settings
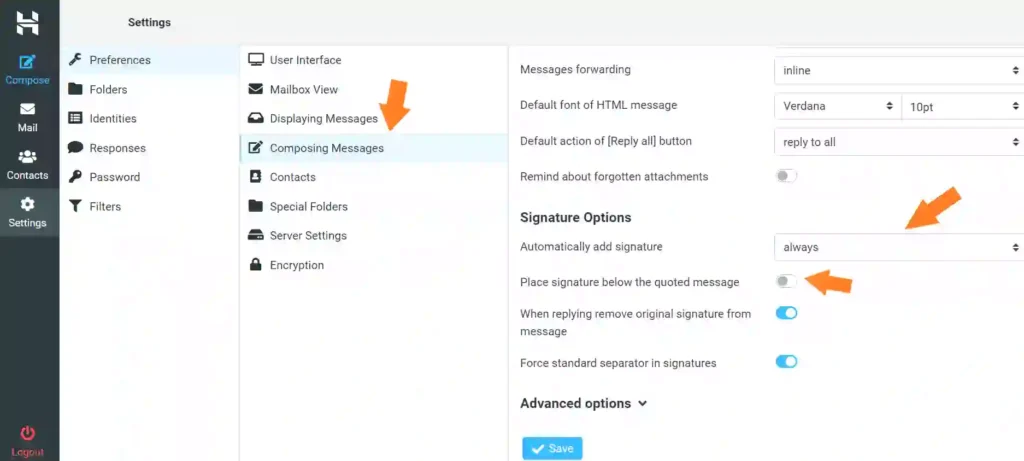
click on preferences and in the side menu click on composing messages finally you have to do these settings as I showed in the screenshot
- Automatically add signature (Always)
- Place signature below the quoted message is ON
Once you add these settings click on the ‘Save‘ button to apply changes
3. Set up an Email client
Now your email is ready it’s time to set up an Email client on your device. An Email client is an application that sends and receives Emails directly across multiple devices including Desktops and Mobile phones.
The main benefit of using an email client is managing multiple emails in one place making your work more efficient, some Email clients also help to improve your productivity by providing international various apps such as Google Calendar and Dropbox
I’ll show you how to set up email clients using free applications like Mozilla Thunderbird but first, take a look at how to configure the Email client on the Hostingers web using email Hosting
Step 1:- Email clients using Hostinger Web
The first thing you do is log in to your Hostiner Hpanel and open the email settings
click on Configuration settings to get the email service settings as I have shown below, this is where you get all email incoming and outgoing mail server details.
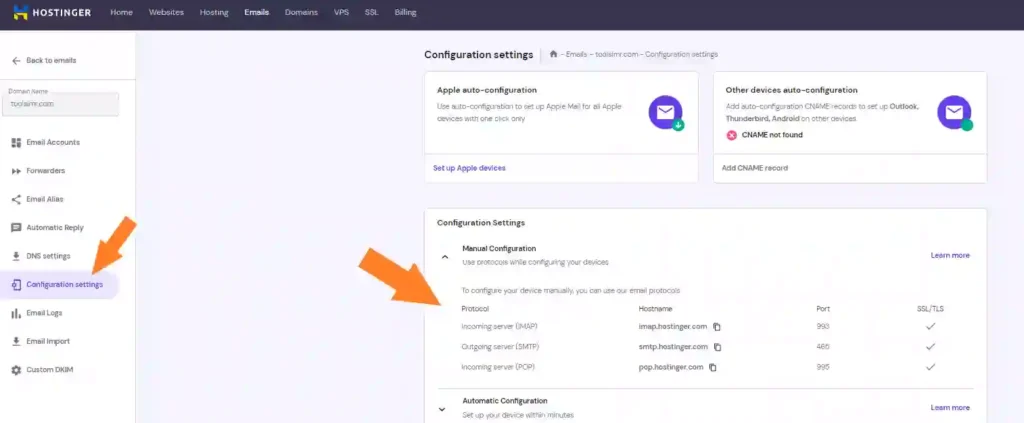
Once you get all the necessary information for the setup process all you have to do is add them to an Email client application
This process may vary slightly depending on which application are you going to use. I will use Mozilla Thunderbird as an example.
Let’s jump into it
Step 3:- Add Email protocols to Mozilla Thunderbird
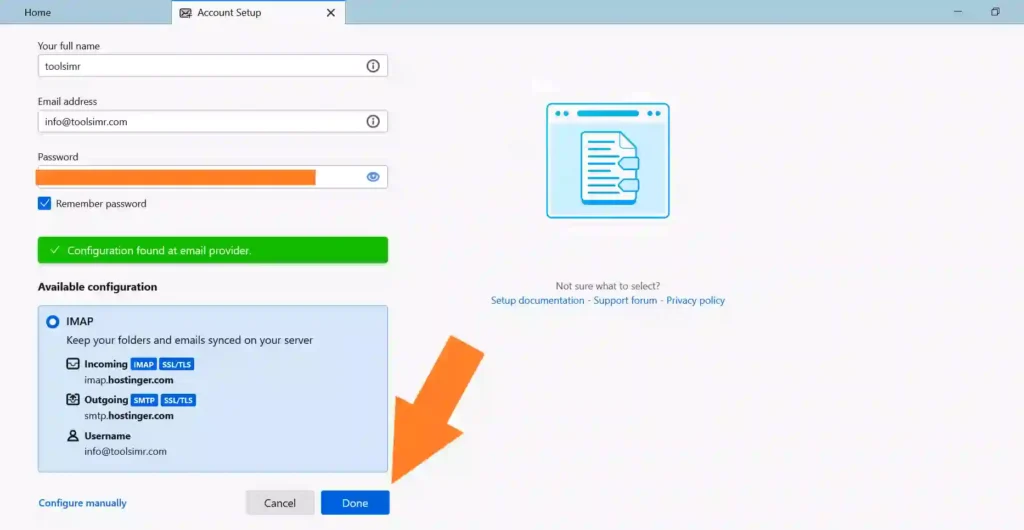
In the Thunderbird, application enter your name, email address, and Password, and click continue to proceed as I showed in the screenshot.

Thunderbird may automatically detect and adjust your account settings based on your domain’s name if that’s the case finish the process.
Now you should be able to send and manage emails directly from your Mozilla Thunderbird client you want to add another email to your client repeat the same process.
Congratulations your professional email is ready to use and you can access it by the email client
Final Words
There you go!
Now you have learned how to create a Hostinger webmail.With personal email, you can use it for business or personal purposes. If you’re a blogger, you must have professional email.
I hope you loved my content. If you’ve got any queries, please let me know in the comment section.
You may also be intrested in:
- How to create a subdomain in Hostinger | 5 Proven steps
- Hostinger Review 2024: Top Features, Drawbacks, and More
- How to Renew Hostinger Domain and Hosting (2024)
- 10 Best Web Hosting Services in 2024
FAQs
Is email free in Hostinger?
In Hostinger service there are free and premium plans available and it depends on what plan you choose. For example, Certain Hostinger plans include a limited number of free email accounts and storage space, while others charge extra for email hosting.
Is Hostinger is cheaper than Godaddy?
The price of Hosting services depends on several factors such as hosting, resources, and features of the service. Godaddy and Hostinger both offer different hosting services and the cost depends on which Hosting plan you choose.
Advantages of webmail?
Webmail is better than regular email apps in a number of ways. Anyone with an internet connection can use it, which is great for people who need to check their email while they’re on the go.
Webmail services also give you a lot of space to store emails and files, so you don’t have to worry about running out of room.
Webmail is very easy to use, doesn’t need any software to be installed, and often has security features built in to protect you from threats.